
We offer a number of specialty vinyls to make your art come to life in a variety of different ways!
This post will explain how our printing process for these vinyls work, and how you can manipulate your artwork to best utilize the material.
Understanding how basic printing works
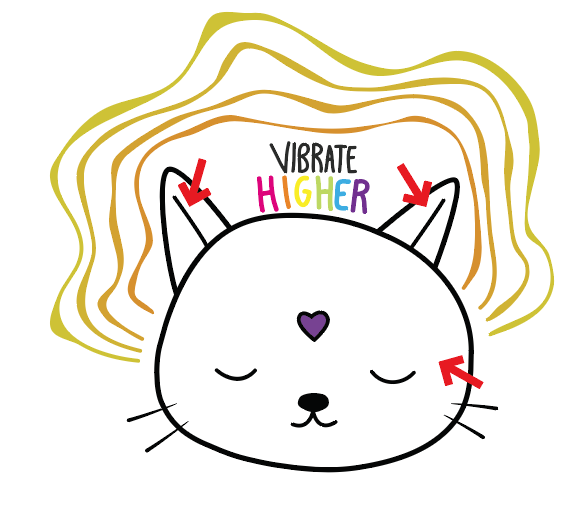
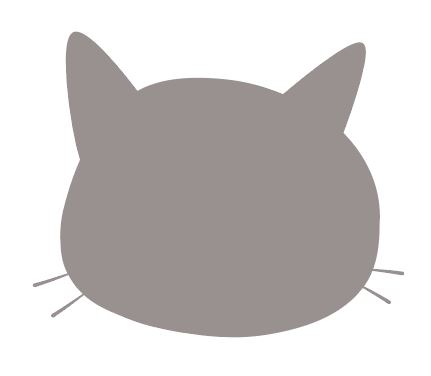
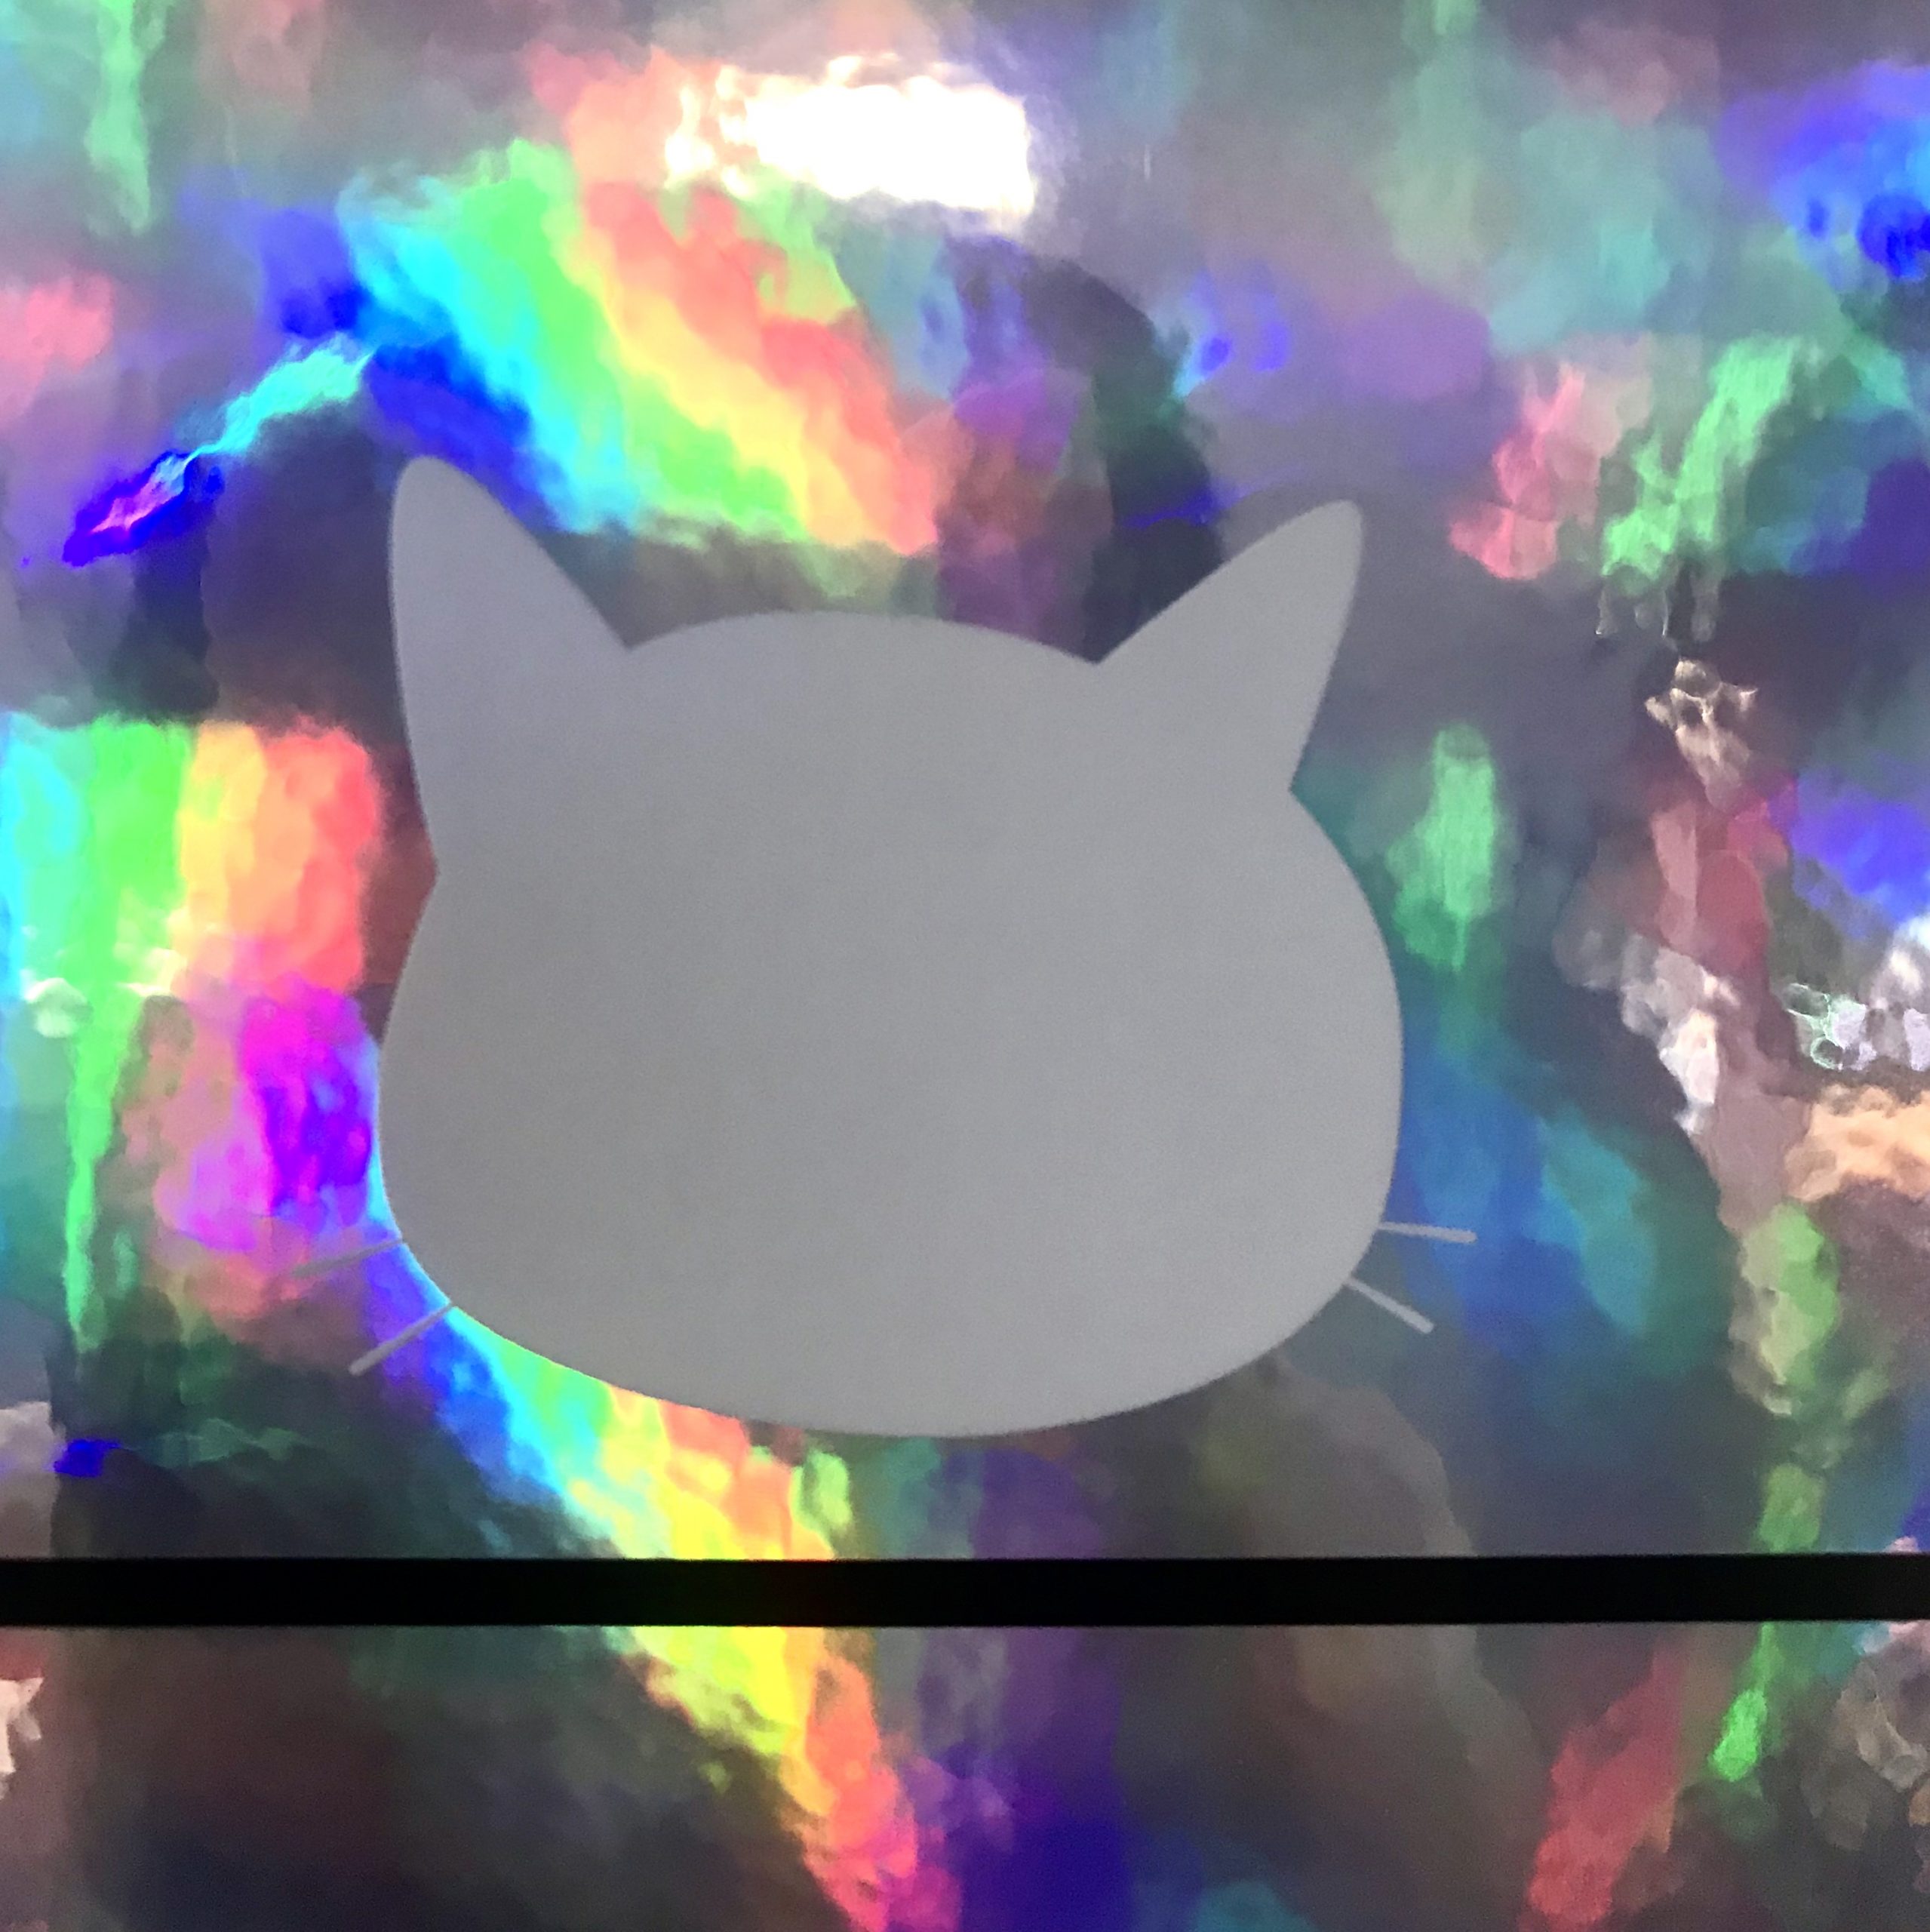
Let’s first begin with how printing from the monitor to the printer works! Let’s take a look at some art and breakdown what is actually getting printed.
Take note on the white space within the artwork on this file. The red arrows indicate all the white space.
Vinyl
This leads us to our next topic- vinyl! We print on top of durable vinyl material, and most of the time this material is white for all our basic kiss/die cut stickers.

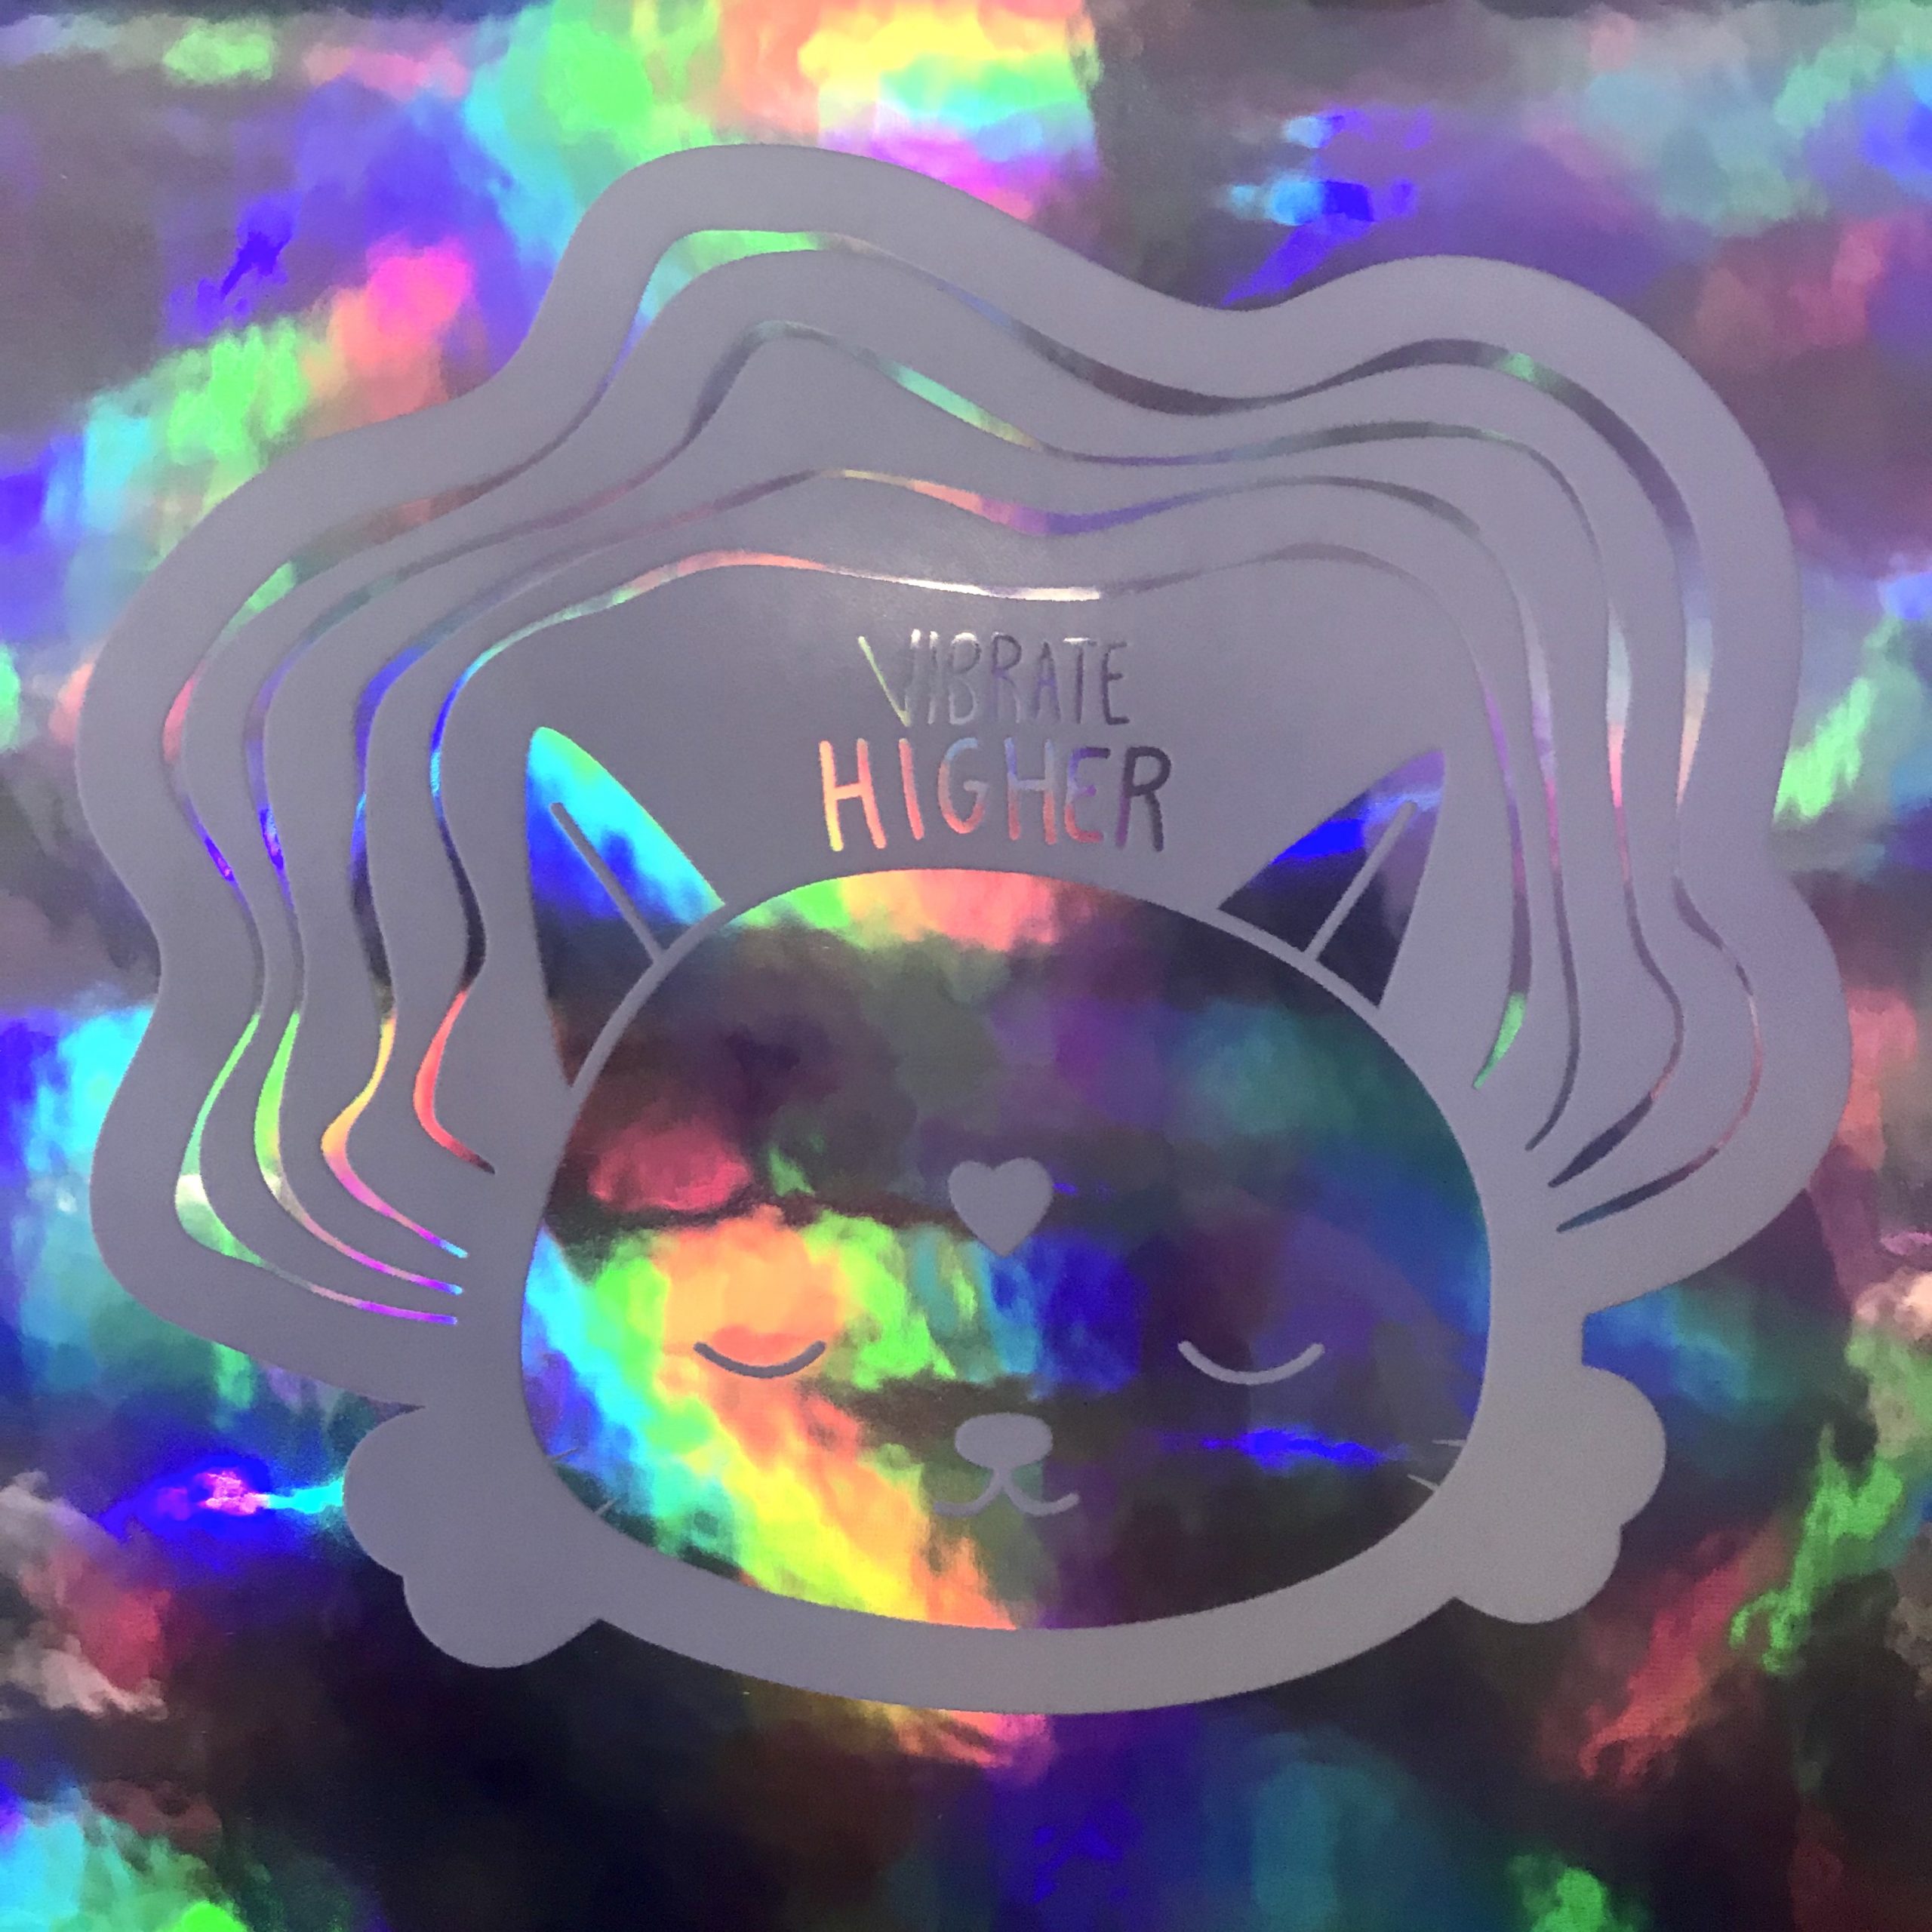
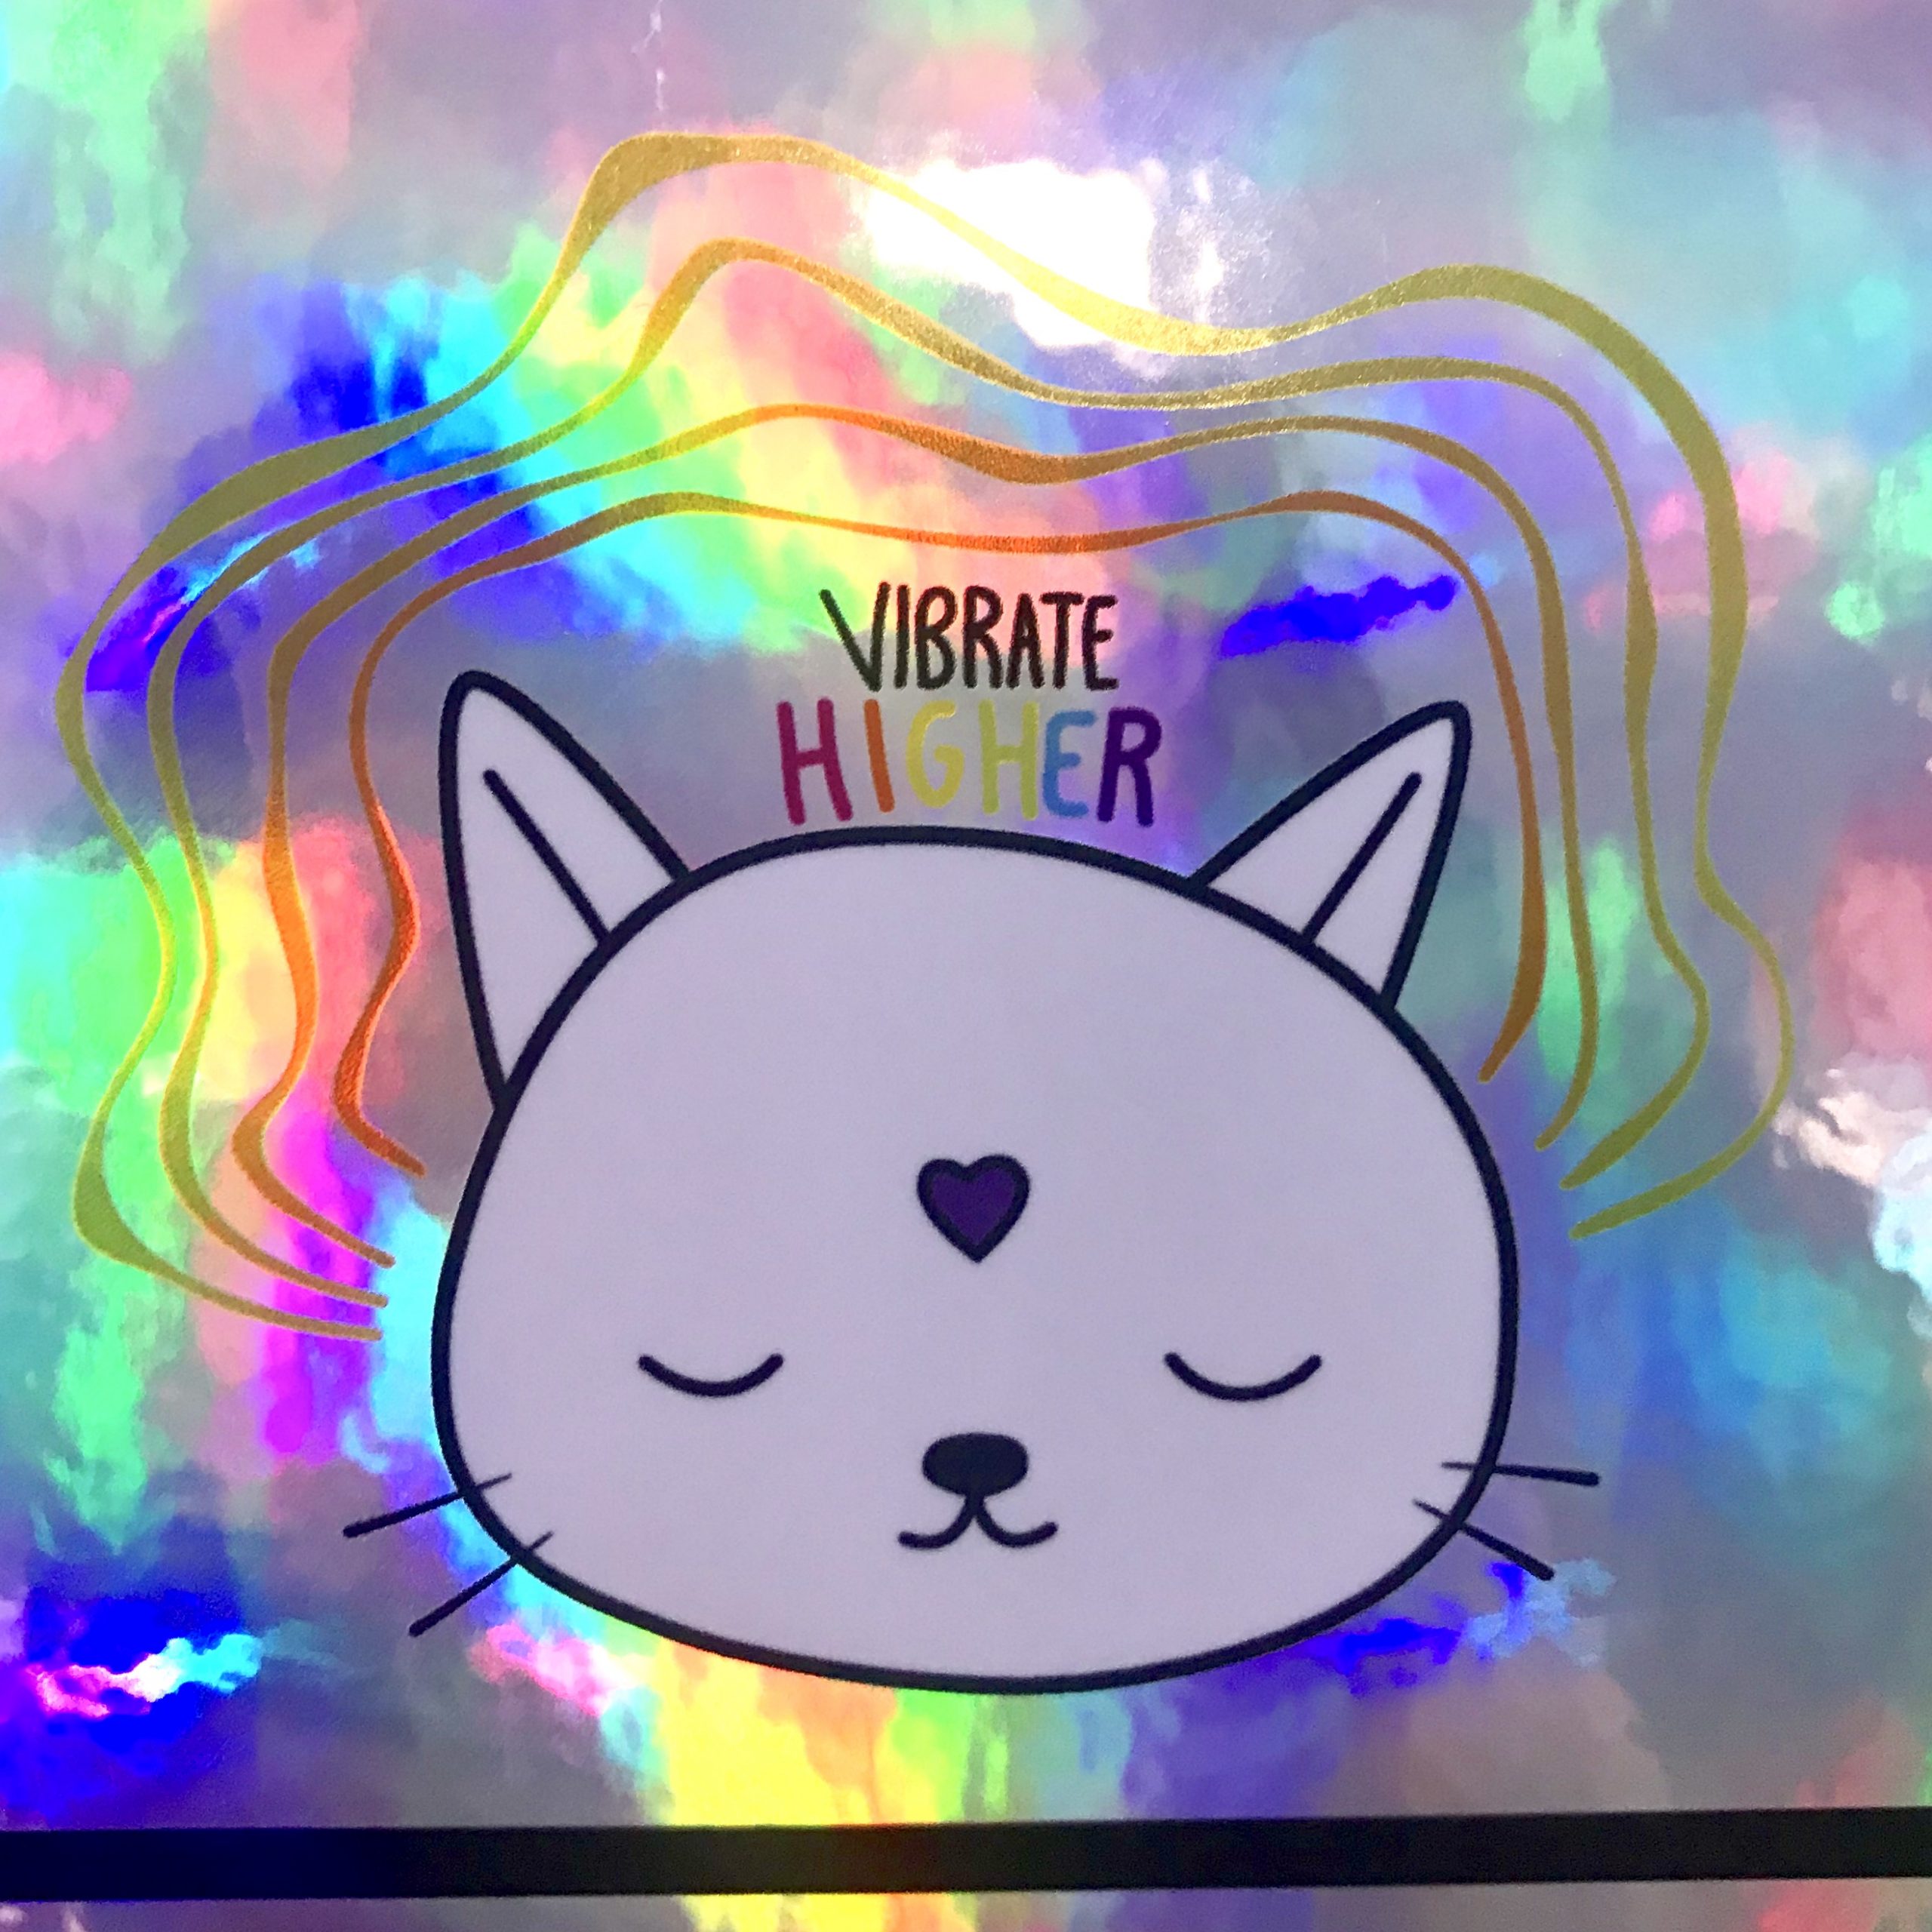
Vinyl also comes in many different colors and options. We load up our printer with big rolls of these special vinyls and print directly on top of these materials. The negative/white space in your artwork that we mentioned above, will now default to these colors. The negative space in your artwork will now translate to a holographic/glow-in-the-dark/chrome/clear depending on which option you want to print on!
Other colors in your artwork will be effected by the vinyl color as well. Your colors will take on the effect of the vinyl- a yellow color will become a holographic-y yellow, a red will be a chrome colored red, and so on.
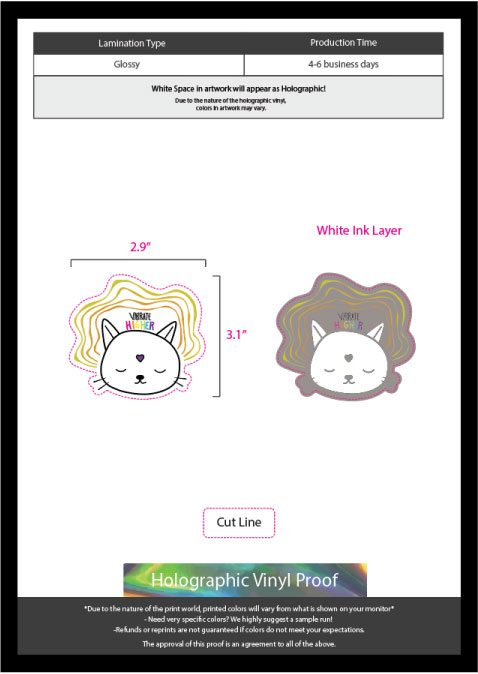
Printing with white ink
With these specialty vinyls we have the option of using white ink! White ink is another ink cartridge that some printers have. Printers will only print the white ink if it’s a spot color within the artwork prep.
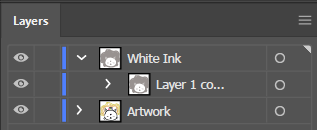
White ink will block out the effects of the material it is printed on. We can pick and choose where we want the white ink to be placed on the artwork to create really neat effects with the artwork! How it works is the printer first prints out the layer of white ink for your artwork, followed by printing out the colors in your artwork directly on top of it. Let’s take a look at how the white ink layer was prepped for the artwork above using 3 different styles of white ink and how it translates to its final sticker form!
Example 1:

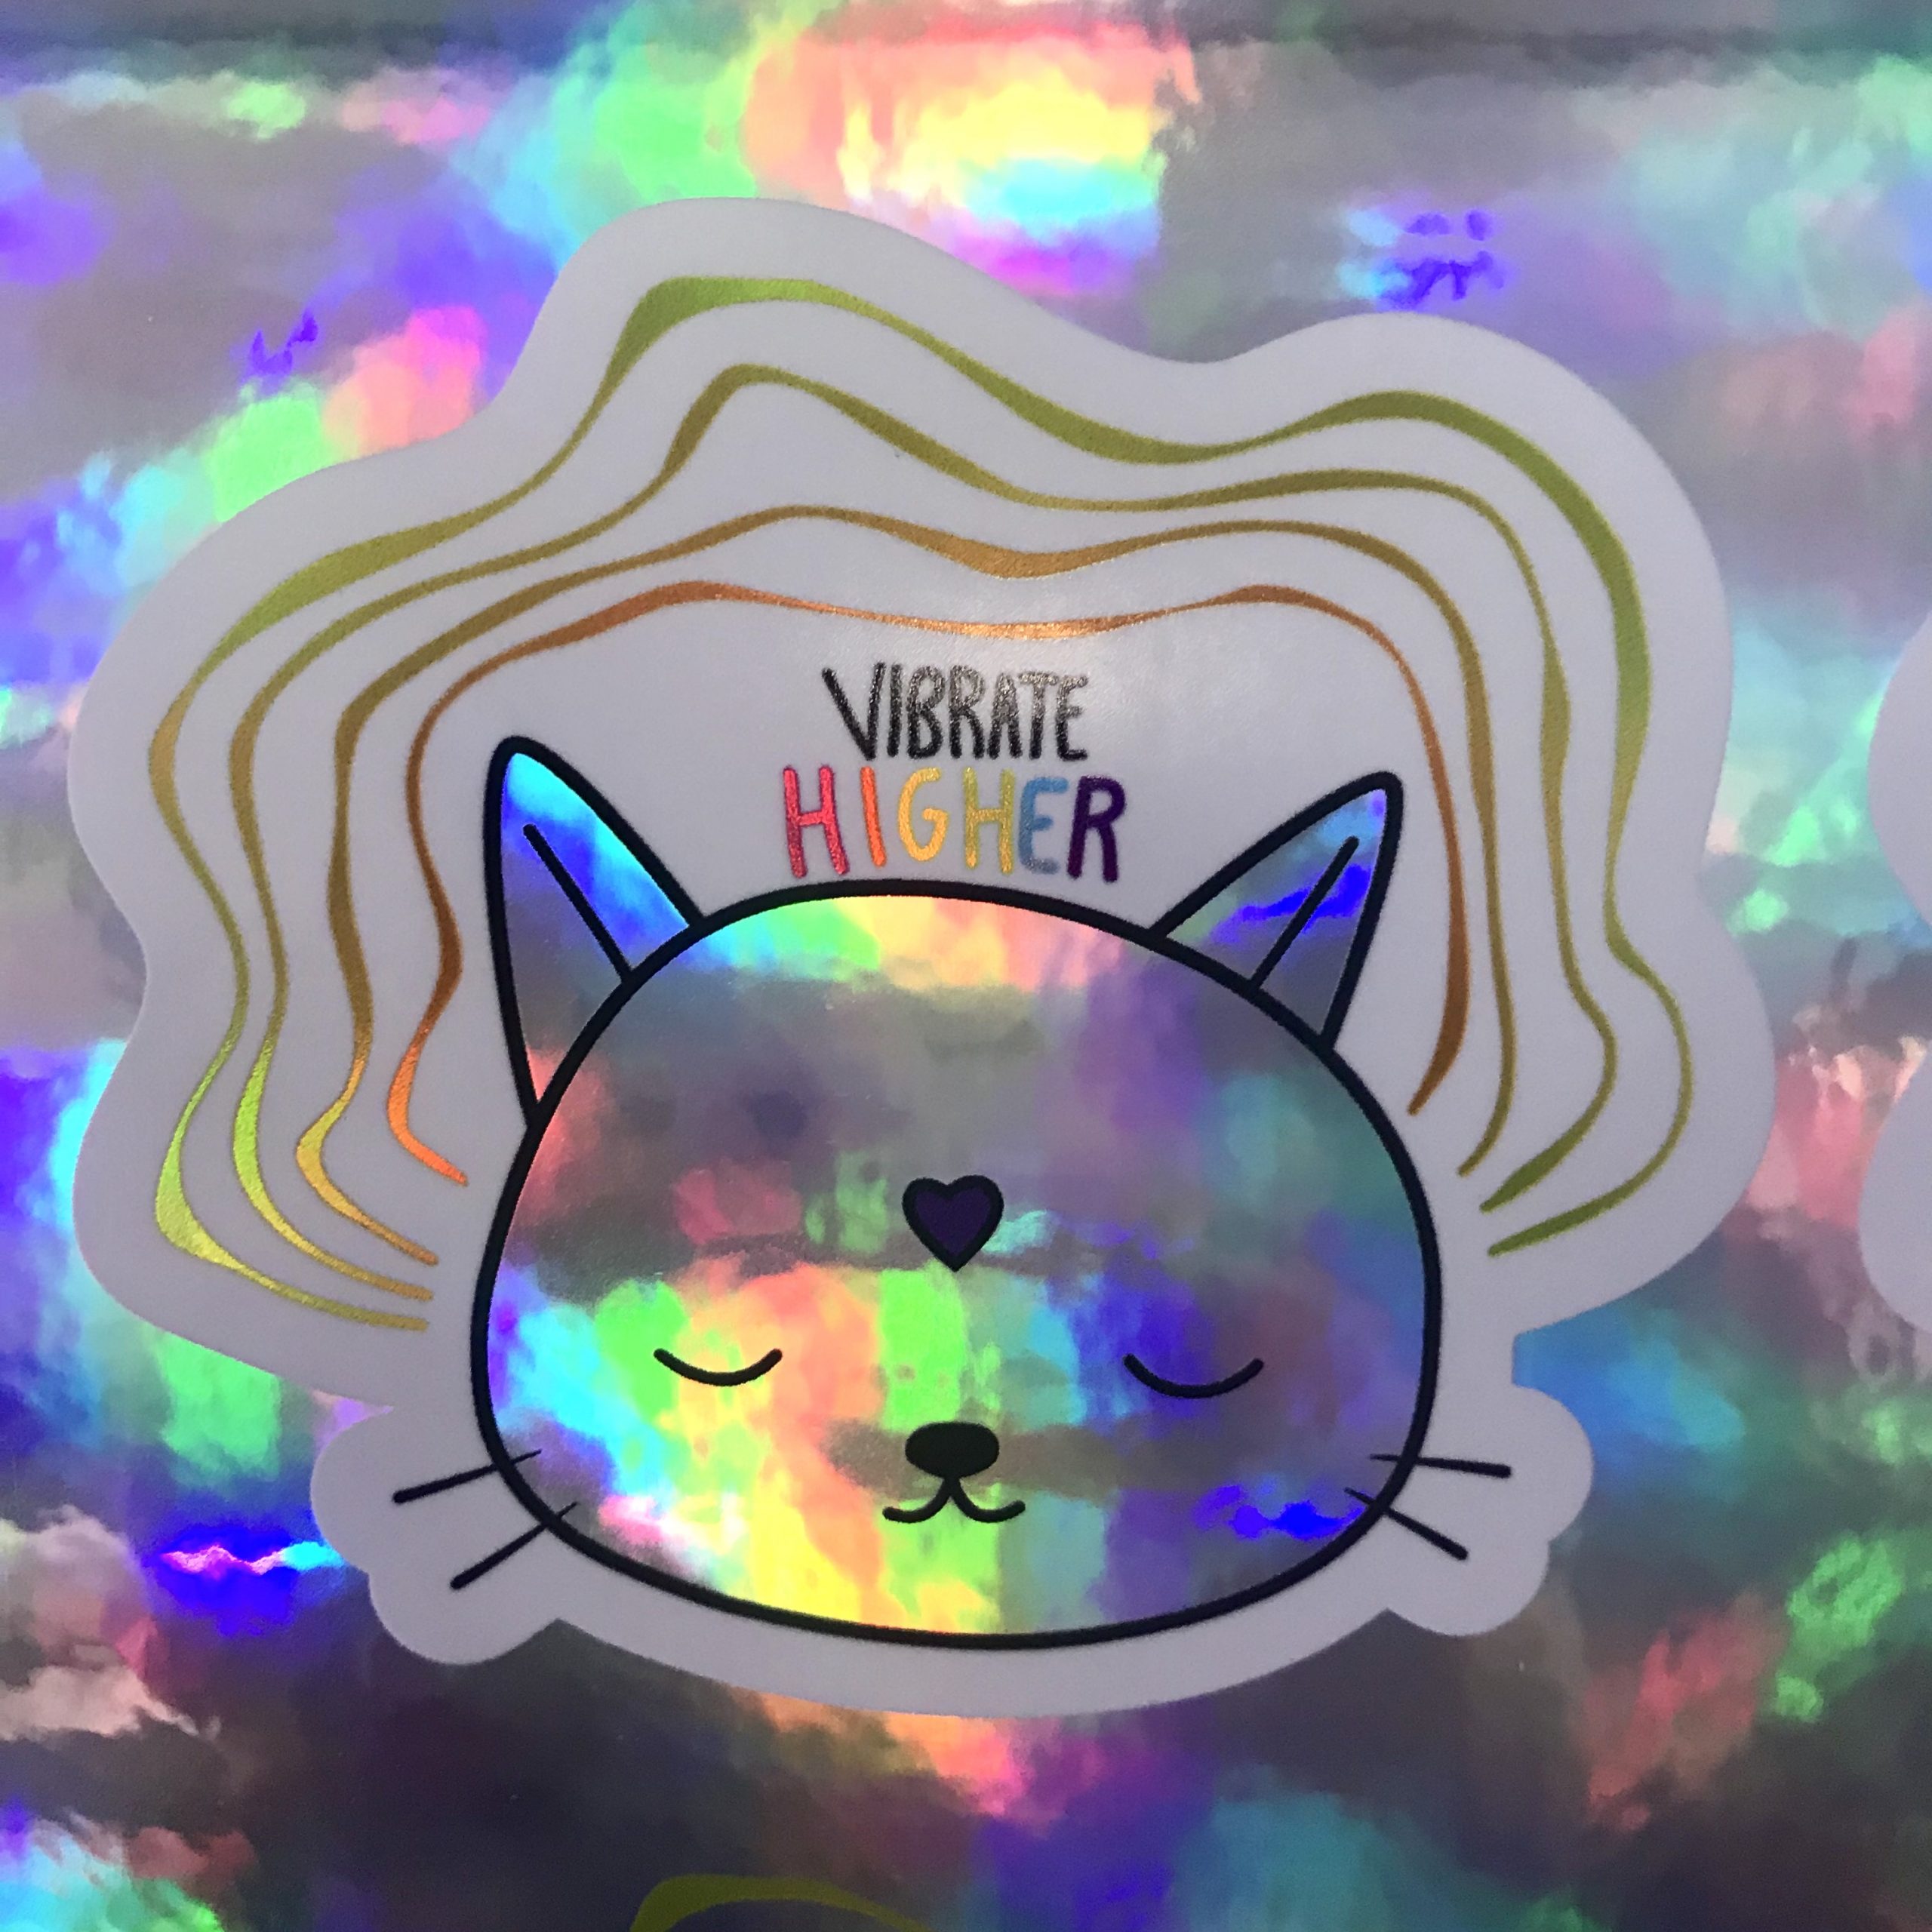
Example 2:

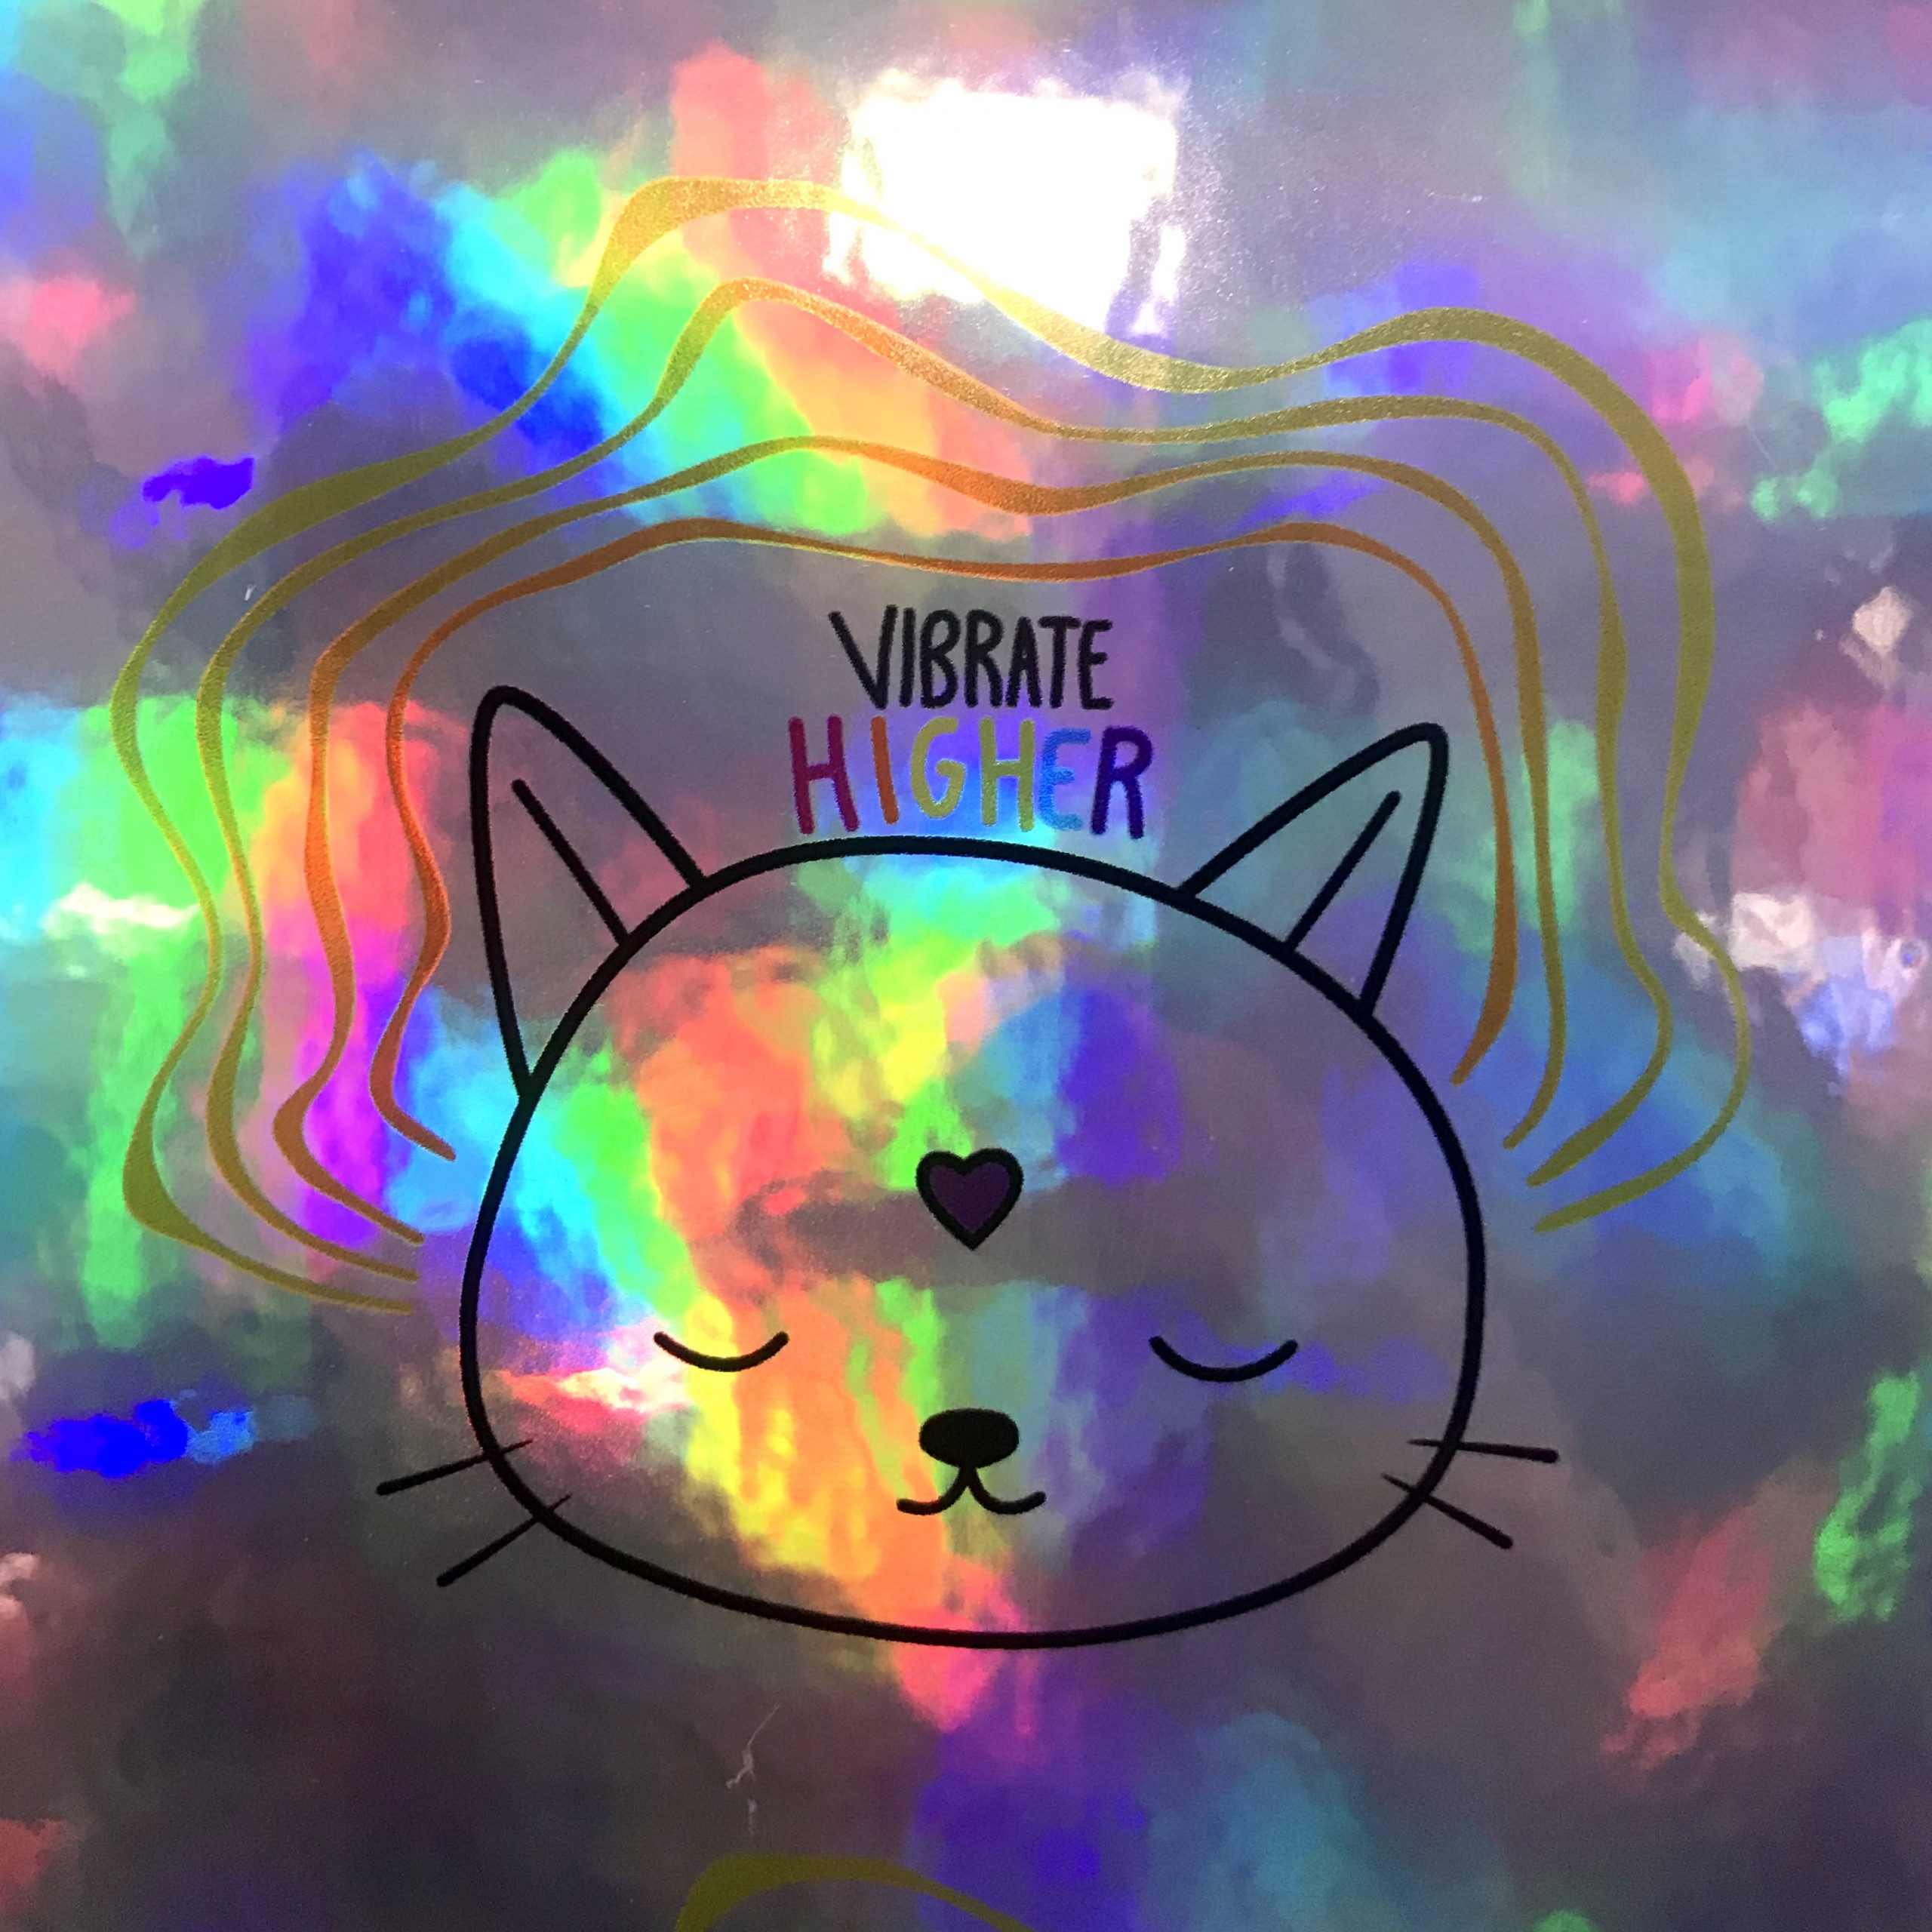
Example 3:
File Prep
There isn’t anything special that needs to be done for these specialty stickers! Upload your artwork as normal. Providing the highest res image you have available is helpful for us when it comes to create the white ink layer but not necessary. We have a team of talented designers who are ready to prep your artwork for print! Let us know in the order notes what you are picturing for the specialty vinyl and we’ll make it happen!
If you are wishing to prep the white ink layer yourself you will need to provide a layered PDF file. Artwork on the first layer and the white ink layer on the second! The white ink layer will need to be in a vector format.
Once you have placed your order, you will receive a proof showing you where the white ink layer will be placed! This will give you an idea of what your finished sticker will look like! You are welcome to decline the proof if you need any changes made 🙂
We hope you are now a little more educated when it comes to our specialty vinyl and are ready to turn your art into something extra special!!
White ink can be applied to any of the materials below:
Clear, Frosted, Holographic, Vapor Wave, Chrome, and Unicornicopia
Let’s get creative!